
SEASONAL NOTES
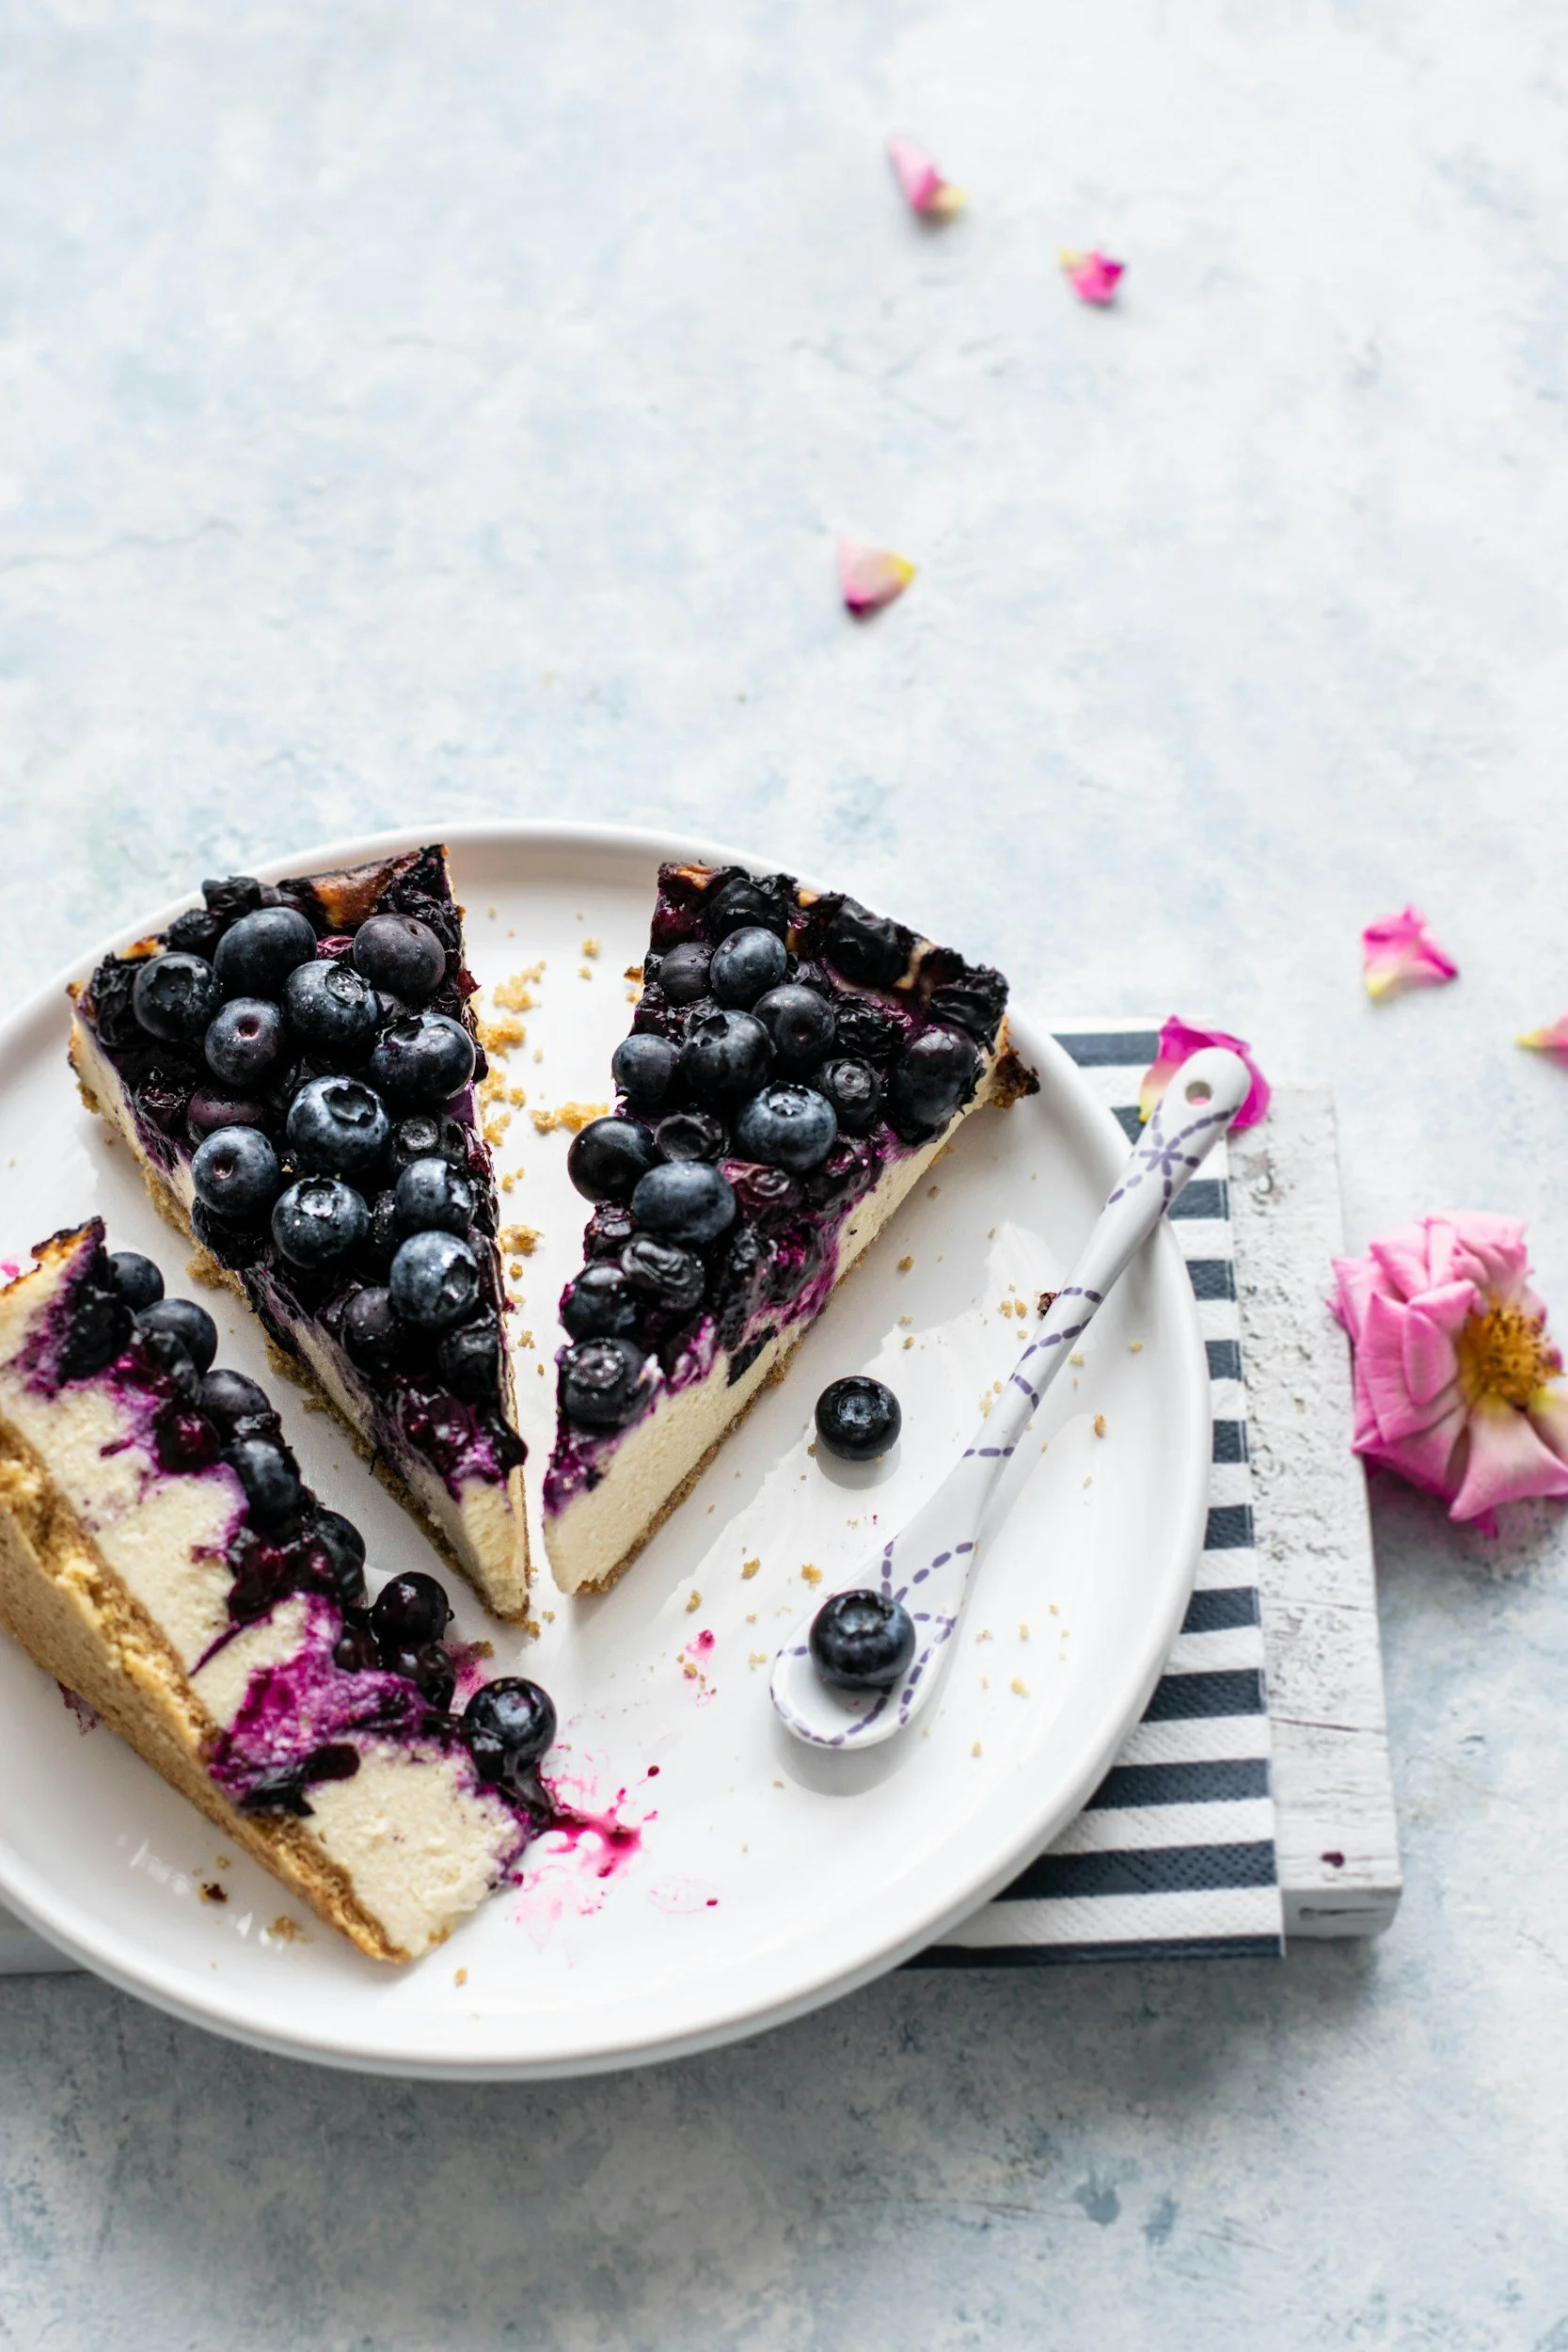
Blueberry Cream Cheese Pie with Crumble Topping
December 14, 2023
Ingredients for Blueberry sauce:
· ½ cup sugar
· 1 tbsp cornstarch
· 1 tbsp lemon juice
· 1 tbsp water
· 2 cups fresh or frozen blueberries
Ingredients for Cream Cheese Pie:
· 1 8oz cream cheese at room temperature
· 14oz sweetened condensed milk
· ¼ cup lemon juice
· 1 tsp vanilla
· 1/8 tsp salt
Crumble Topping:
· ½ cup flour
· ½ cup brown sugar
· 6 tbsp melted butter
· ½ tsp cinnamon
1 Graham Cracker Pie Crust
Directions:
Combine all the cream cheese filling in a bowl and stir together until well combined. Pour into Graham Cracker crust and cover loosely with plastic wrap. Refrigerate for at least 4 hours.
For blueberry sauce - Stir together sugar, cornstarch, water, and lemon juice in a small saucepan. Add blueberries and stir to coat. Set pan over medium heat and cook, stirring frequently, until the mixture boils and thickens quite a bit. About 10 to 20 minutes. Remove from heat and cool to room temperature. Spread over cream cheese filling that has already been chilling for 4 hours or more and chill the pie for another hour or so.
Combine all the crumble toppings in a bowl and stir together until well combined. Crumble the topping over the blueberry sauce and chill the pie for another hour.
Coconut Burfi
December 14, 2023

1 tbsp Ghee (Clarified Butter)
2-3 Cardamom Pods
A Few Saffron Strands
1 ½ Cups Full Fat Milk
½ Cup Sugar
For Garnish:
Chopped Pistachios
Process:
Heat ghee in a deep non-stick pan, add cardamom seeds, and sauté on a medium flame for a few seconds.
Add coconut and sauté on a medium flame for 7-8 minutes.
Add saffron strands to 2 tbsp of warm milk and set aside.
Add milk and sugar, mix well, and cook on a medium flame for 45 min, while occasionally stirring and scraping the sides until milk evaporates.
Add saffron milk and let it cook for an additional 2-3 minutes.
Transfer the mixture into a greased 7” pan and spread it evenly using a flat spatula.
Garnish with pistachios, press it lightly using a flat spatula, and keep it aside to cool completely for an hour.
Cut coconut burfi into squares and serve or store in an air-tight container.
Chocolate Chip Cookies
December 14, 2023
INGREDIENTS:
· 1 cup salted butter softened
· 1 cup granulated sugar

· 1 cup light brown sugar packed
· 2 teaspoons pure vanilla extract
· 2 large eggs
· 3 cups all-purpose flour
· 1 teaspoon baking soda
· ½ teaspoon baking powder
· 1 teaspoon sea salt
· 2 cups chocolate chips (14 oz)
INSTRUCTIONS
1. Preheat oven to 375 degrees F. Line three baking sheets with parchment paper and set aside.
2. In a medium bowl mix flour, baking soda, baking powder and salt. Set aside.
3. Cream together butter and sugars until combined.
4. Beat in eggs and vanilla until light (about 1 minute).
5. Mix in the dry ingredients until combined.
6. Add chocolate chips and mix well.
7. Roll 2-3 Tablespoons (depending on how large you like your cookies) of dough at a time into balls and place them evenly spaced on your prepared cookie sheets.
8. Bake in preheated oven for approximately 8-10 minutes. Take them out when they are just barely starting to turn brown.
9. Let them sit on the baking pan for 2 minutes before removing to cooling rack.
Mama's Old-Fashioned Albondigas (Meatball Soup)
December 14, 2023
Stock:

1 gallon water
3 cups tomato sauce
1 yellow onion, quartered
4 tablespoons chicken bouillon (such as Knorr®)
3 cloves garlic, minced
1 tablespoon dried oregano
Meatballs:
3 pounds lean ground beef
3 eggs
½ cup tomato sauce
¼ cup uncooked white rice
¼ cup chopped fresh cilantro (Optional)
1 tablespoon seasoned salt (such as Season-All®)
1 tablespoon dried oregano leaves
½ teaspoon onion powder
½ teaspoon garlic powder
¼ teaspoon ground black pepper
¼ teaspoon ground cumin
10 small baby potatoes
5 large carrots, sliced diagonally
5 stalks celery, sliced diagonally
2 zucchinis, chopped
2 cups thickly shredded green cabbage
1 lemon, sliced into wedges (Optional)
2 avocados, chopped (Optional)
¼ cup chopped fresh cilantro (Optional)
Directions
1. Pour water into a large stockpot over high heat. Stir in 3 cups tomato sauce, yellow onion, chicken bouillon, garlic, and 1 tablespoon dried oregano. Bring broth to a slow boil.
2. Combine ground beef, eggs, 1/2 cup tomato sauce, white rice, 1/4 cup cilantro, seasoned salt, 1 tablespoon dried oregano, onion powder, garlic powder, black pepper, and cumin in a large bowl. Squeeze mixture with your hands until thoroughly mixed.
3. Scoop 1/4 cup of beef mixture and form in a ball. Lower gently into boiling broth. Repeat with remaining beef mixture.
4. Stir potatoes, carrots, and celery into the broth. Cover and simmer until meatballs and potatoes are tender, about 30 minutes. Stir in zucchini and cabbage. Cover and simmer until cabbage is tender, about 10 minutes.
5. Serve with a squeeze of lemon juice and garnish with avocado and 1/4 cup cilantro.
CLASSIC PEANUT BUTTER BLOSSOM COOKIES
December 24, 2019
INGREDIENTS:

1/2 cup granulated sugar
1/2 cup packed brown sugar
1/2 cup creamy peanut butter
1/2 cup butter or margarine, softened
1 egg
1 1/2 cups Gold Medal™ all-purpose flour
3/4 teaspoon baking soda
1/2 teaspoon baking powder
Additional granulated sugar
About 36 Hershey's® Kisses® Brand milk chocolates, unwrapped
PREPARATION:
Heat oven to 375°F. In large bowl, beat 1/2 cup granulated sugar, the brown sugar, peanut butter, butter and egg with electric mixer on medium speed, or mix with spoon, until well blended. Stir in flour, baking soda and baking powder until dough forms.
Shape dough into 1-inch balls; roll in additional granulated sugar. On ungreased cookie sheets, place about 2 inches apart.
Bake 8 to 10 minutes or until edges are light golden brown. Immediately press 1 milk chocolate candy in center of each cookie. Remove from cookie sheets to cooling rack.
TIPS:
Add razzle-dazzle by rolling the balls of dough in colored sugar instead of regular granulated sugar.
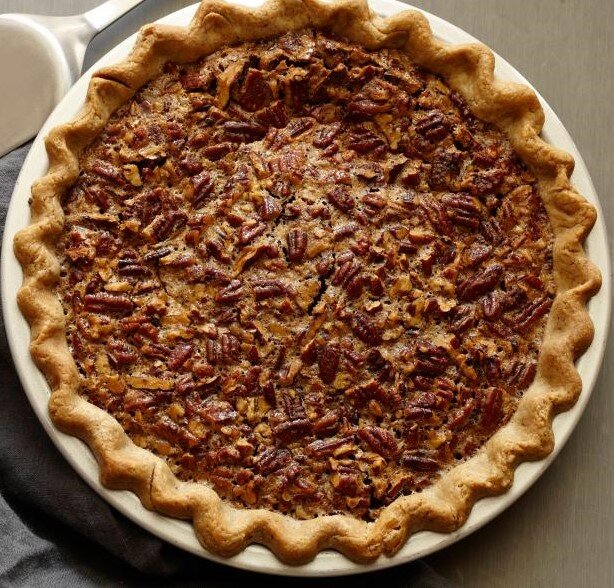
PECAN PIE
December 24, 2019
Refrigerated Pie Crust
3 large eggs
1/2 cup sugar
1/4 teaspoon salt
3 tablespoons butter, melted
1 cup dark corn syrup
1 teaspoon vanilla extract
2 cups pecan halves
PREPARATION:
Fit piecrust into 9” pie plate according to package directions. Fold edges under & crimp.
Whisk together eggs and next 5 ingredients until thoroughly blended. Stir in pecans.
Pour mixture into pie crust.
Bake at 350 degrees on lower rack for 40 minutes or until pie is set. Cover edges of crust with Reynolds wrap after 15 minutes of baking.
Cool completely on wire rack. Serve with vanilla ice cream.
HOMEMADE GRANOLA RECIPE
December 23, 2019

For the Granola:
12 ounces old-fashioned rolled oats, not instant, quick, or steel-cut (about 3 1/2 cups; 340g)
1 1/2 ounces wheat germ (about 1/3 cup plus 1 tablespoon; 40g)
1 ounce flax seeds, optional (about 3 tablespoons; 30g)
1/2 ounce chia seeds (about 1 heaping tablespoons; 15g)
8 ounces buttermilk (about 1 cup; 225g)
4 ounces unsalted butter, melted (about 8 tablespoons; 115g)
7 ounces plain or toasted sugar (about 1 cup; 200g)
1/2 teaspoon (2g) Diamond Crystal kosher salt; for table salt, use about half as much by volume or the same weight
For the Mix-Ins:
4 1/4 ounces raw pumpkin seeds (about 3/4 cup; 120g)
2 1/2 ounces chopped almonds (about 1/2 cup; 70g)
2 1/4 ounces pecan pieces (about 1/2 cup; 65g)
1 teaspoon neutral oil, such as safflower
1/8 teaspoon Diamond Crystal kosher salt; for table salt, use about half as much by volume or the same weight
4 ounces dried apricots, quartered (about 1/2 cup, firmly packed; 115g)
3 ounces dried tart cherries (about 1/2 cup; 85g)
2 ounces dried blueberries (about 1/3 cup, firmly packed; 55g)
PREPARATION:
For the Granola: In a medium bowl, combine rolled oats, wheat germ, flax seeds (if using), and chia. Toss with a flexible spatula to combine, then stir in buttermilk and melted butter. Cover with plastic or a kitchen towel and set aside until oats are stiff and dry, about 20 minutes (the chia will look a little fuzzy, but that's normal). Stir in sugar and salt, cover, and let stand until the mixture looks loose and damp from the dissolved sugar, about 30 minutes.
For the Mix-Ins: Meanwhile, adjust oven rack to middle position and preheat to 350°F. Combine pumpkin seeds, chopped almonds, and pecan pieces on a parchment-lined half-sheet pan and toast until fragrant and just beginning to brown, about 10 minutes. Transfer to a large bowl, toss with oil, then sprinkle with salt; reserve the parchment-lined half-sheet pan. Stir in dried apricots, dried cherries, and dried blueberries too.
To Bake the Granola: Reduce oven temperature to 300°F. When the sugar has dissolved, scrape oats onto the parchment-lined half-sheet pan and spread into an even layer. Bake until uniformly golden brown and dry to the touch, about 100 minutes, pausing every 25 minutes or so to take the mixture from the oven to stir well with a pair of forks.
When the oats are golden brown and dry to the touch, transfer to the bowl of fruit and nuts. Toss with a flexible spatula until well combined, then return to the baking sheet and spread in an even layer to cool, about 45 minutes. As soon as the granola has cooled, transfer to an airtight container and store up to 6 weeks at room temperature.
AEBLESKIVER DANISH PANCAKES
December 23, 2019

INGREDIENTS:
2 eggs
2 cups all-purpose flour
1 tablespoon sugar
2 teaspoons baking powder
1/2 teaspoon baking soda
1/2 teaspoon salt
4 tablespoons butter, melted, plus extra for the pan
2 cups buttermilk
PREPARATION:
In a medium bowl, beat the egg whites with an electric mixer until stiff peaks form.
In a separate, large bow, combine the flour, baking powder, salt, baking soda and sugar. Stir well, then add the egg yolks, melted butter and buttermilk and mix just until combined.
Gently fold the beaten egg whites into the batter. Batter will be fairly thick.
Heat your aebleskiver pan over medium heat until hot. Brush each cup with a little melted butter using a pastry brush, then fill each cup with about 2 tablespoons of batter until almost full.
As soon as the aebleskivers begin to bubble around the edges, use a wooden skewer, chopstick, knitting needle or fork to flip them over half way, letting the batter slide around to fill in bottom of the cup.
Continue cooking, turning the aebleskiver again to let the batter fill in the remainder of the sphere and continuing to turn until golden brown all the way around and cooked through.
Transfer to a serving plate and dust with powdered sugar, then serve with jam.
TIS THE YEAR TO GIVE
December 23, 2019

Though I am not a father myself, the other joy in my life is the sponsorship of a little boy, Reilin Hernandez, in the Dominican Republic. I am blessed with the gift of loving Reilin and his family through Compassion International. I am able to visit his family for a couple of weeks every year in their village. Watching him mature and participating in his social and spiritual growth brings a special meaning and perspective to my life.

Donation of shoes for “Iglecia Communidad” in Santiago

Dominican Republic: Enjoying a meal & fellowship

Hillside provides Thanksgiving and Christmas Dinner to our local homeless community
AUTUMN CHECKLIST: 5 TIPS FOR READYING YOUR OUTDOOR SPACE
October 24, 2019
Just because the sun sets earlier and temperatures dip doesn’t mean outdoor spaces can’t still be the heart of the home. Though the weather can fluctuate in the fall, updating your outdoor entertaining space for the cooler season is simpler than you think.
The team at Camp & Camp has prepared an Autumn Checklist with 5 ways to fall-ify your outdoor spaces and enjoy the great outdoors as long as possible.
1. Lights Out

Drue Residence, Lafayette
Sunset comes earlier this time of year, so there's no better time to think about outdoor lighting. Outdoor fixtures allows us to enjoy outdoors longer while adding a festive feel to outdoor spaces. For a more temporary solution, string lights are a great way to perk up outdoor spaces any time of year. If you prefer a uniform finish, hang them parallel to each other, tightly securing them over your gathering space. For a more carefree look, drape them on tree branches or loop them on the fence. The soft glow of twinkling lights adds warmth and sparkle even on the chilliest of evenings.

Gafney Residence
2. Cozy Up to a Fire

Smith Residence, Diablo
If the wind starts nipping, adding a heat source such as a fire pit or gas lamp can do the trick. And thanks to some very innovative designs, they have never looked better. Outdoor fireplaces are sleek and efficient, and add warmth to your outdoor area in more ways than one. Your fire pit can serve as the heart of the backyard during the fall months. And, make sure to have cozy throws on hand.

Curry Residence, Alamo
3. Entertain & Dine Al fresco

Curry Residence, Alamo
Dining outdoors can be enjoyed well after the kids go back to school. From Oktoberfest parties to Thanksgiving, take your dinner outside and squeeze out every last moment of weather-friendly evenings. Arbors, gazebos, and outdoor kitchens provide a nice controlled environment for entertaining. Adding music, outdoor movies and video entertainment keep kids and adults going well after sunset. These destinations are appealing for friends and families who want to gather outside – adding comfort and togetherness in the autumn weather.

Challinor Residence, Diablo
4. Repurpose Natural Resources
Those falling leaves are natural way to provide extra nutrients to your lawn and garden. Instead of throwing out this natural resource, consider using those leaves as mulch for your lawn or garden beds. Rent a leaf mulcher to finely chop the leaves to use over the lawn or spread them around plants in your outdoor living space. Prepare your outdoor living space by having a plan for falling leaves in order to provide a natural and free resource to your outdoor living area.
5. Spruce Up
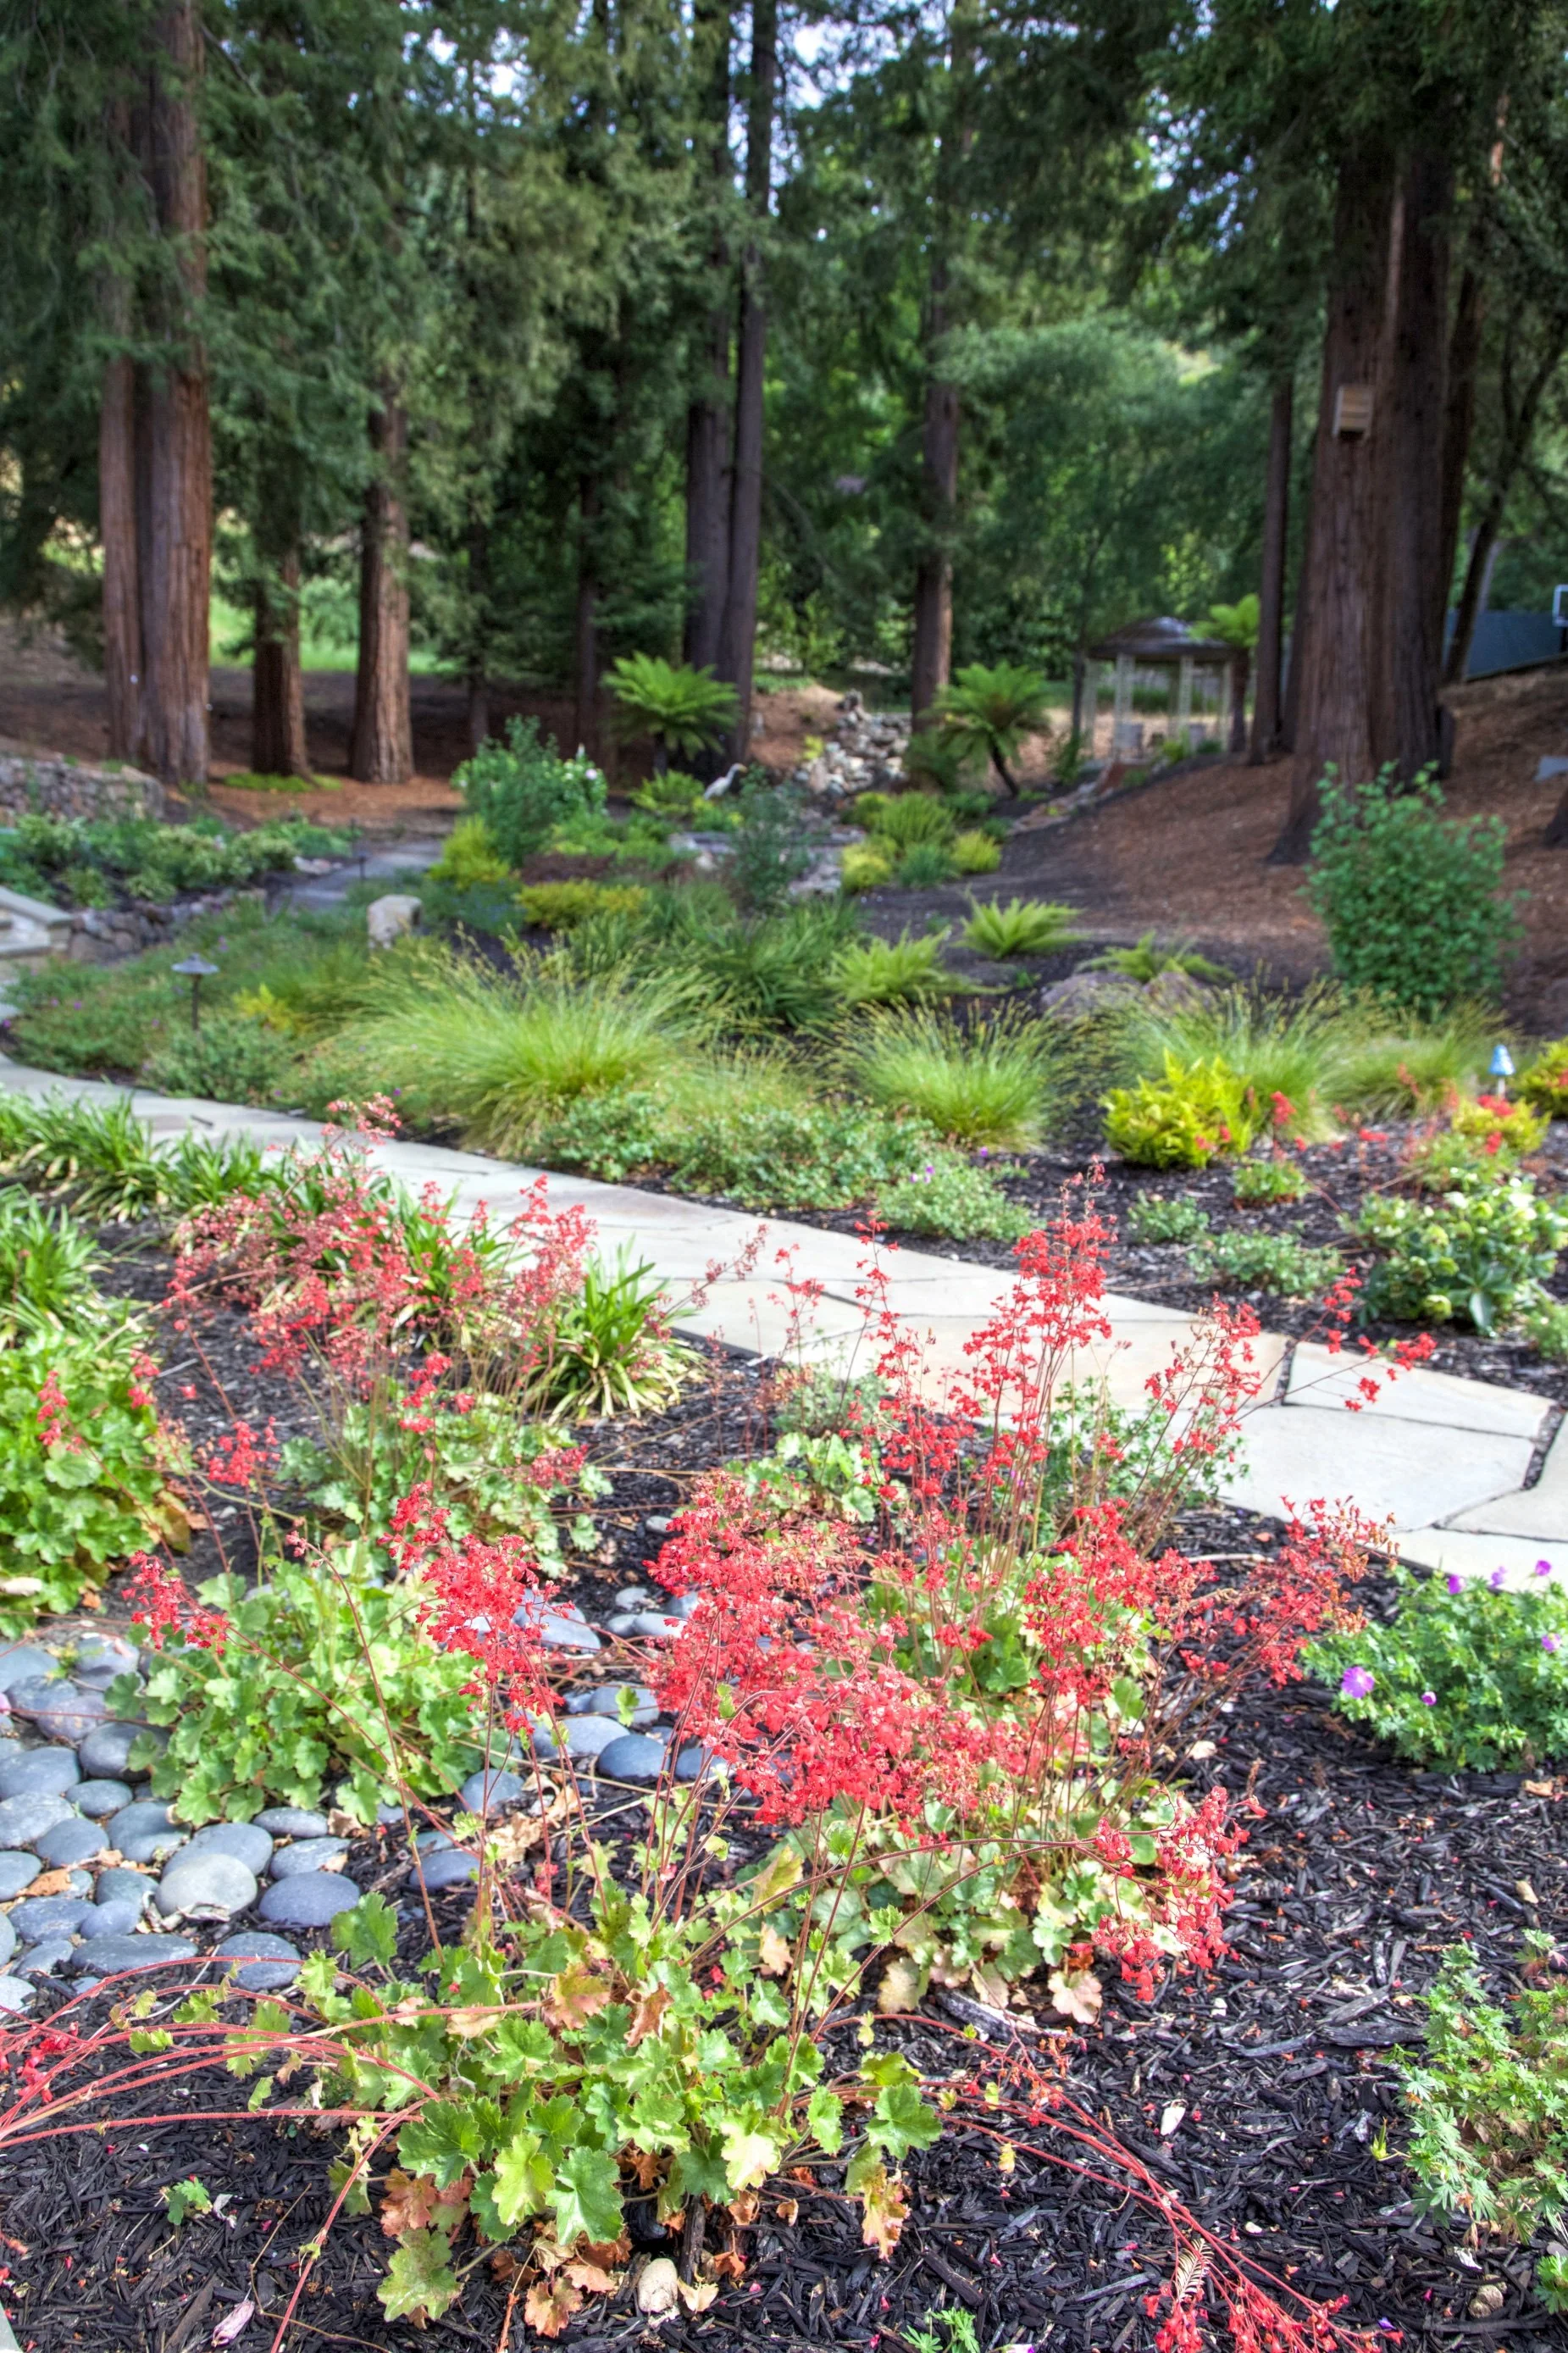
Watson Residence, Lafayette
Design elements, wreaths and garlands are a great way to bring nature into your outdoor space this fall. Their nature-inspired colors create a warm welcome for visitors. Introduce plants with deep crimson and near-black leaves, add vibrant accents of orange and red, and purple-toned grasses. Mix and match different sized planters and place them on front steps of your doorway or near the yard’s lounge chairs for an eye-catching pop of color during fall.
Gardening Tips Summer Survival Guide
June 27, 2019
Summer heat takes its toll on everyone, and our outdoor spaces are no exception. Keeping your plants happy and healthy throughout the hottest season is vital to both their growth and longevity.
The experts at Camp & Camp compiled a Summer Survival Guide with tips to grow a gorgeous summer garden and care for it throughout the season.
1. CHOOSE SUMMER PLANTS WISELY

Choose decent-sized specimens and don’t be tempted to overcrowd the space. Use plants that thrive in summer as this will save you work and help conserve water. Herbs are fabulous plants, with garden and kitchen uses galore, and are particularly useful in a dry season. Rosemary, marjoram, sage, thyme, winter savory and chives are good choices in the garden, and they will do well in a sunny spot even in a drought.
Helping your plants thrive is often a case of proper planning, placement and soil fertility. A strong plant can better withstand the stress of high heat and dry weather. So fertilize the soil well before planting using organic compost and other sustainable fertilizers.
3. TAKE CARE OF BUDDING PLANTS

A sudden loss of buds and flowers is often a consequence of the plants drying out in the Summer, particularly when they are growing in containers. Mulch and water deeply once or twice weekly during hot, dry weather to limit this common and irritating problem.
4. HELP POTS TO STAY COOL

Potted plants, especially those in terracotta pots, are vulnerable to overheating. Lightly mulch and, where possible, position them out of hot western sunshine. Remember that standing potted plants in saucers of water encourages root rot and mosquito breeding. Instead, stand them in saucers filled with sand, and keep the sand moist. This ensures roots stay cool and plants remain healthy.
5. WATER EARLY & WATER WELL
Whether growing annuals, herbs, newly planted perennials, or trees, they need a good dose of water: at least one inch per week. Water in the morning when it’s cool – not only for plants, but for yourself. If you water in the afternoon, allow enough time for foliage to dry out before sunset.
6. WEED AND HARVEST
You’ve weeded all summer, so don’t stop now. If weeds are left and go to seed, you’ll have ten times more problems next year. The strong root systems of weeds will compete with new transplants for water, nutrients and light. Deadheading should continue, too. Removal of spent flowers at the stem base supports plant energy for development of more fruit, veggies or flowers.
7. PROTECT NEW PLANTINGS & SHADE STRATEGICALLY

Freshly planted vegetable and flower seedlings are likely to need a bit of sun hardening. Shelter them with 50 percent shadecloth, old net curtains, dead palm fronds, or leafy branches for a week or two. This helps them establish without harm. Northern boundaries may benefit from some extra shade. Strategically placing a deciduous tree, vine or some clumping bamboo to shield your house and garden from searing western sunshine is a good option.
8. DOCUMENT AND PLAN FOR SEASON AHEAD
When temperatures outside drive you inside, start prepping for next year’s garden based on this year’s outcomes. Set yourself up for success by documenting where everything was planted and how it did. Think ahead applies to spring-blooming bulbs, too, such as tulips and daffodils that are planted in the fall. Cool season crops, such as cabbage, broccoli, spinach and collards will also planted in September along with another round of lettuce, parsley, cilantro and more.
THE SUMMER HOT LIST: TOP 3 TIPS FOR OUTDOOR ENTERTAINING
June 27, 2019
Summer kicks off the entertaining season and there are many ways to extend your living and entertaining space from indoors outward—to create the ultimate backyard lifestyle. The team at Camp & Camp emphasize these three elements for outdoor living—adding ambience and functionality to your outdoor environment.
The Ultimate Outdoor Kitchens

Pictured: Landscape Architect Terry Camp worked collaboratively with this Orinda couple and their landscape team to turn their backyard wishes into a reality. This kitchen was designed by Camp and Camp with serious entertaining in mind. The expansive backyard features a fully independent outdoor kitchen with an all-Kalamazoo product lineup, requested for its design flexibility, performance and superior features. To go behind the design of this scenic outdoor space, read more in: Kalamazoo Gourmet.
An outdoor kitchen represents the height of entertaining luxury. Whether you are dreaming of a rustic outdoor pizza oven or a sleek line of stainless steel appliances, adding an outdoor kitchen can extend your living and entertaining space substantially.
For the planning stage for your new kitchen, there are several important considerations to keep in mind. Whether it’s a portable set up, an island kitchen, or full outdoor cooking space with top of the line appliances, consider how you’ll use the space, where it’s located, and how it will hold up to the elements. This will help determine your design to a functional and long-lasting kitchen.
Stay Cool with Shaded Structures
In the hot summer months, a shaded area will make outdoor cooking and entertaining much more pleasant. To provide shade and shelter, plant some nearby trees or incorporate an awning or pergola in the design. For seating areas, consider a patio umbrella. By adding some creature comforts, you can ensure that your outdoor space is welcoming and comfortable no matter what season it is.
Layouts Designed for Comfort & Conversation
Whether designing for a small balcony, on a deck with a view, or for an expansive patio, the ideal layout of your outdoor space is one that fosters living, comfort and conversation. There are endless configurations to create an outdoor living room, but the key is to pull in plenty of varied seating options and thoughtful zones. Some rules of thumb: use materials and colors that complement the home’s architecture and design; furniture should be to scale and preserve sight lines; and always keep the area in front of the doors clear.